I decided to dabble a bit with home automation and for the time being I am more interested in first getting an idea of the different temperatures and humidity readings around my house.
My plan is to also use water leak sensors to detect if the upstairs bath, shower and even the boiler might spring a leak in the future.
For the Zigbee gateway I decided to go down the Phoscon Conbee II route connected to a Raspberry Pi running Home Assistant and my main reason is that I want full control and trust in where my data is being sent to. This also gives me more flexibility to install other devices like Sonoff / ESP modules.
Special mention goes to Trutz Fries’ tutorial that I followed to get started in this.
Hardware and Software used
-
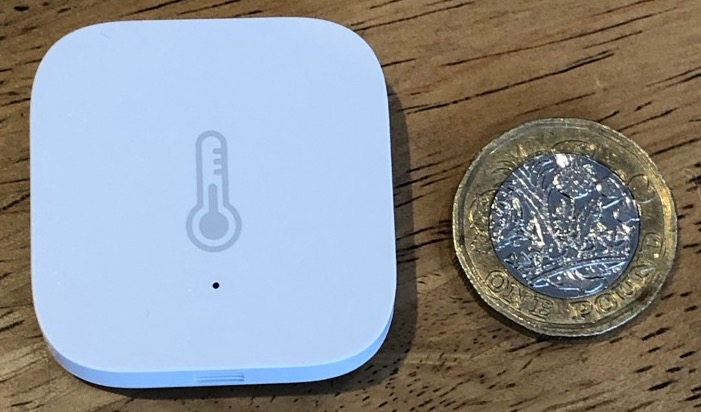
Xiaomi Aqara Temperature and Humidity Sensor (also measures barometric air pressure)

-
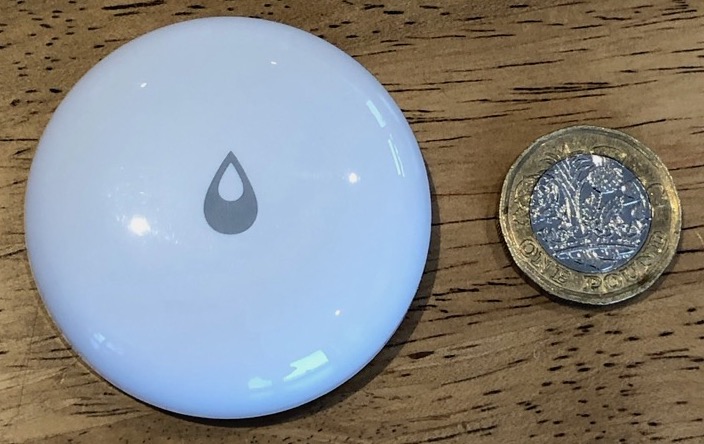
Xiaomi Aqara Water Leak Sensor (also measures temperature, but not as accurately)

- Phoscon Conbee II
- Raspberry Pi 3 B
- SanDisk Ultra microSD 64GB
-
Rhino Cables 1m USB extension cable


- Home Assistant
- balenaEtcher
Installing Home Assistant
I followed the official guide for installing Home Assistant and downloaded the “Raspberry Pi 3 Model B and B+ 64-bit” image.
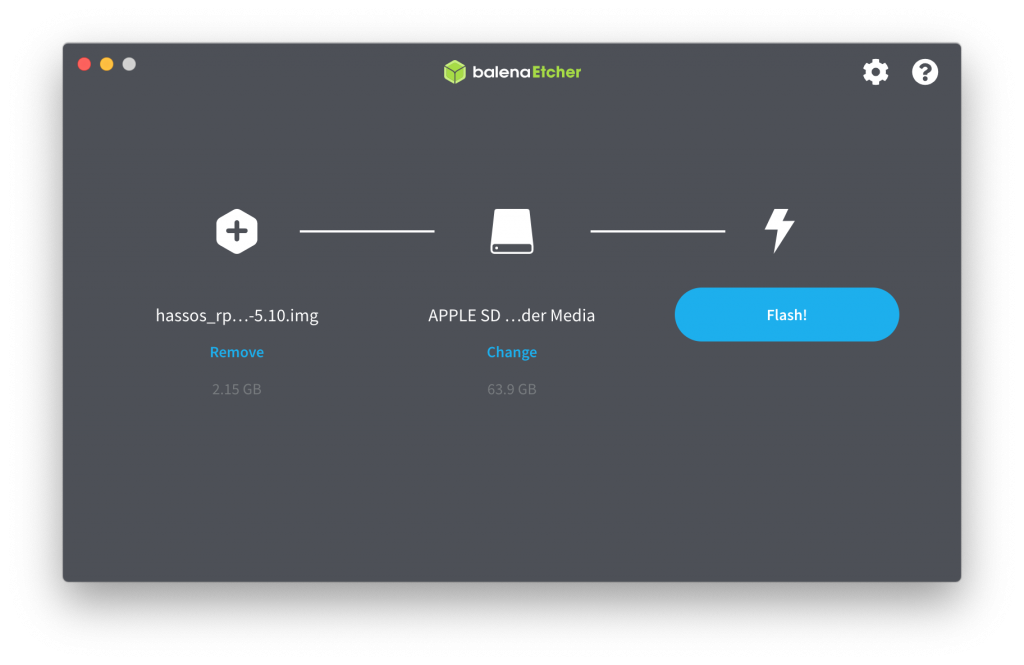
I used balenaEtcher to install the image “hassos_rpi3-64-5.10.img.xz” to the 64GB microSD card.
SD card adapter issue
Interestingly enough I ran into an issue with the microSD card and adapter on my Mac which I have not encountered before. For some reason the SD card kept showing up as being locked even though the adapter is in the unlock position.

After trying a couple of things I noticed that even though I put the lock slider in the unlock position, when I insert the SD adapter into my Mac it somehow gets pushed halfway towards the lock position.

Borrowed my son’s Raspberry Pi 400 adapter and had no more issues for writing to the microSD.
Flash and Boot
Although I have a good WiFi mesh network in my house running off Amazon’s Eero devices, for this project I will be connecting the Raspberry Pi directly to an ethernet connection running from my “boiler room” (a.k.a the Server room) down to my broadband router. The idea being that in the near future I can get my local firewall back up and running again and can have finer control over devices like this.
For some reason you can not setup the WiFi on Home Assistant using the Web interface and have to resort to using a flash disk and rebooting the Raspberry Pi. Not a problem for me since I will only be using the ethernet connection, however the official guide will give you instructions on how to setup WiFi.
I inserted the microSD card, connected the Raspberry Pi to the ethernet network (which I also knew was connected to the internet) and then connected it to the power supply. Home Assistant will boot and take quite a bit of time installing things.
To verify that the Raspberry Pi is connected I just pinged homeassistant.local
$ ping homeassistant.local
PING homeassistant.local (192.168.4.27): 56 data bytes
64 bytes from 192.168.4.27: icmp_seq=0 ttl=64 time=4.140 ms
To access the Web interface just open http://homeassistant.local:8123/. Alternatively you will need to find the IP address of the connected Raspberry Pi (check your Router / DHCP provider / nmap scan).
Now is a good time to go get some coffee and plan where you want to place the sensors.
After a while Home Assistant will be ready to continue the setup process.
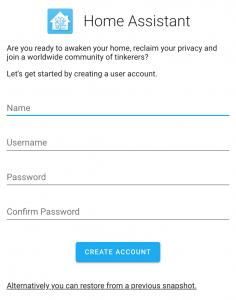
Continue setting up Home Assistant and check the status of your system.
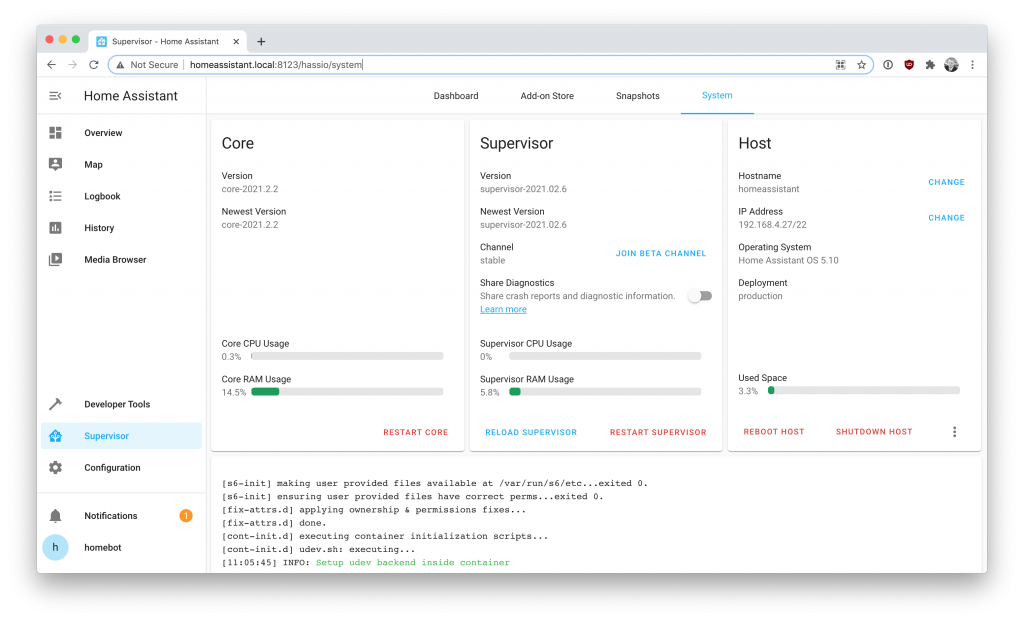
Setting up the Conbee II
Before connecting the Conbee II it is a good idea to get the list of current serial devices so that when you plug the Conbee II in you can easily spot which device it is mapped too.
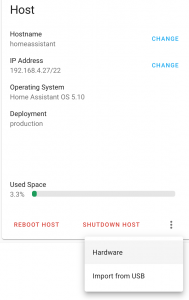
Navigate to Supervisor, System, Host and then select the menu (3 dots) and then Hardware.
I searched for “tty” and looked for a device like this
- name: ttyAMA0
    sysfs: /sys/devices/platform/soc/3f201000.serial/tty/ttyAMA0
    dev_path: /dev/ttyAMA0
Next I plugged in the Conbee II to the Raspberry Pi using the USB extension cable and rebooted the Raspberry Pi (Reboot Host on that same page). It is recommended by Phoscon (makers of Conbee II) to use an extension cable to minimise interference to the device.
Once Home Assistant has rebooted I went back to look at the available devices and searched for “tty” again and this time I found the following device.
- name: ttyACM0
    sysfs: >-
      /sys/devices/platform/soc/3f980000.usb/usb1/1-1/1-1.4/1-1.4:1.0/tty/ttyACM0
    dev_path: /dev/ttyACM0
    subsystem: tty
    by_id: >-
      /dev/serial/by-id/usb-dresden_elektronik_ingenieurtechnik_GmbH_ConBee_II_DE2250706-if00
Make note of the dev_path and by_id portion. I will be using by_id for setting up deCONZ
Installing deCONZ
Navigate to Supervisor, Add-on Store and search for “deconz”.
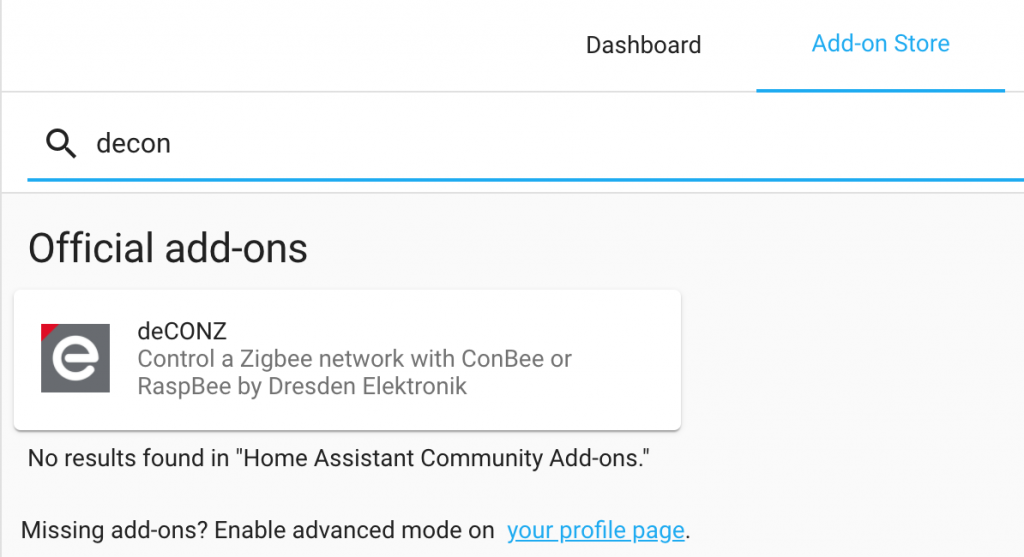
Select the deCONZ add-on and install it. This will take a few minutes.
Once the add-on has been installed you need to go to the Configuration tab and select “Edit in YAML” by using the 3 dot menu.
For the device value I entered (with qoutes) “/dev/serial/by-id/usb-dresden_elektronik_ingenieurtechnik_GmbH_ConBee_II_DE2250706-if00” and the interface will show it like this.

Save and go back to the Info tab. I turned on “Start on boot”, “Watchdog” and “Show in sidebar”.
Start deCONZ add-on and if it starts up correctly you will notice a green dot at the top right.
Now you can configure the Conbee II by selecting “Open Web UI” and selecting Phoscon. I setup the connection by selecting the Phoscon-GW device and setting a login password.
Since I will not be setting up any Phoscon lights I just select Proceed without lights. You will also be asked to create your first group. For the moment I just created my first group with the name “Testing”.
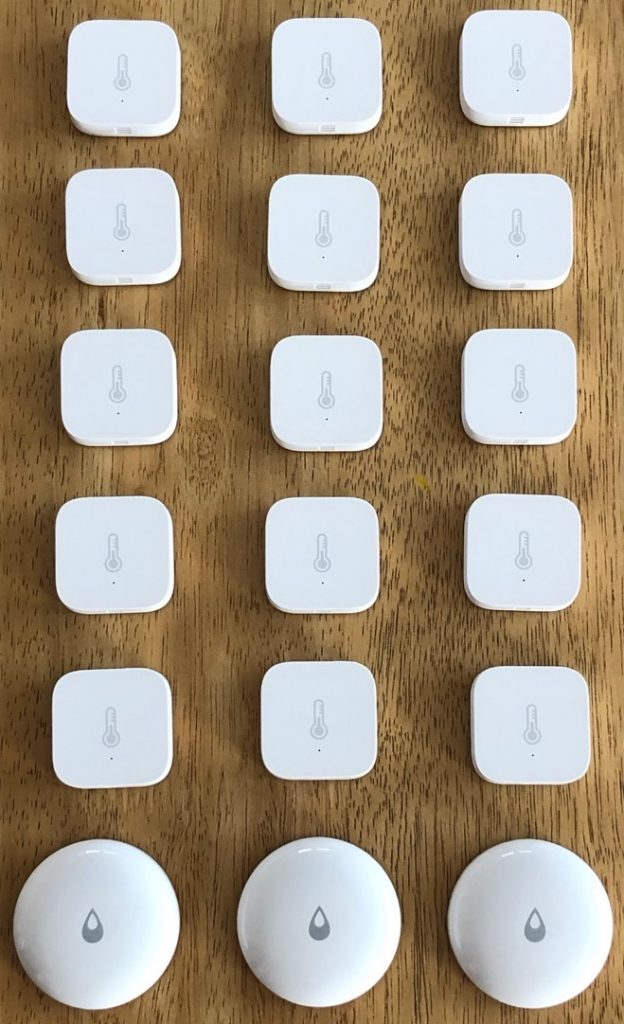
Unboxing the Xiaomi Aqara sensors
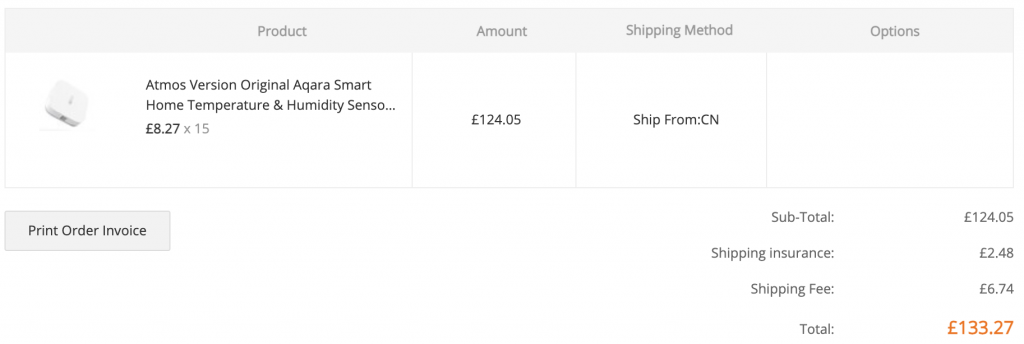
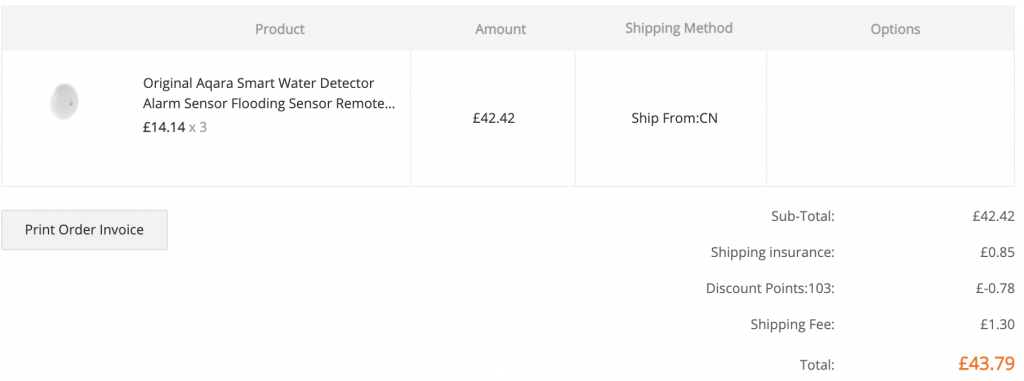
I ordered 15 of the Xiaomi Aqara Temperature and Humidity Sensor and 3 of the Xiaomi Aqara Water Leak Sensor from Banggood and they were shipped from China to the UK.
I paid £8.27 each for the temperature and humidity sensor and £14.14 each for the water leak sensor on the 14th of January 2021. Banggood turned out to be a very good choice because buying the temperature sensor from a UK supplier after Brexit would have been just under £18 a unit!
The sensors arrived in a very good condition and as can be seen in the next photo they are packaged very well.
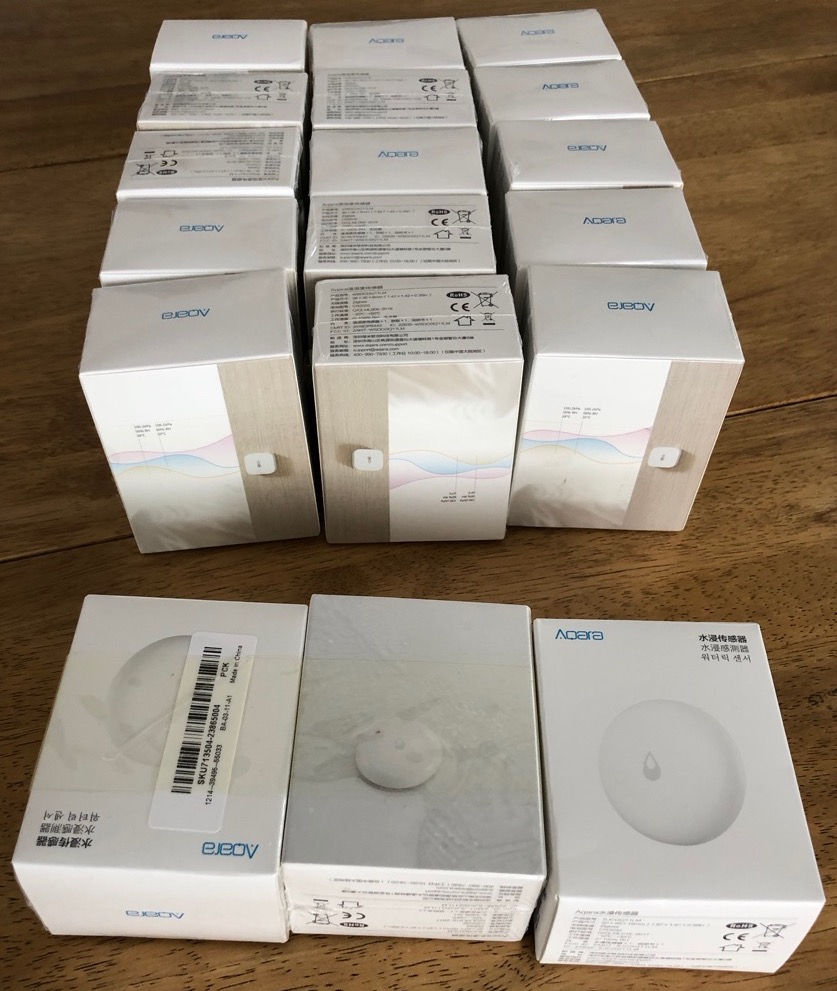
The sensors were smaller than I expected and this is a big bonus in my book.
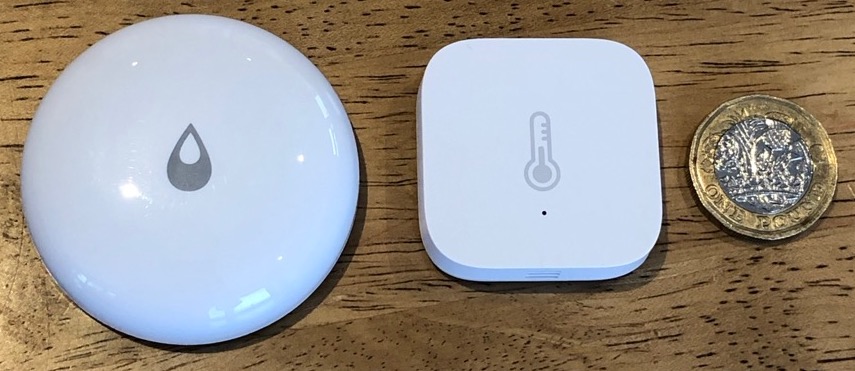
They are operated on a CR2032 coincell battery and should hopefully run for about 2 years before needing to be replaced.
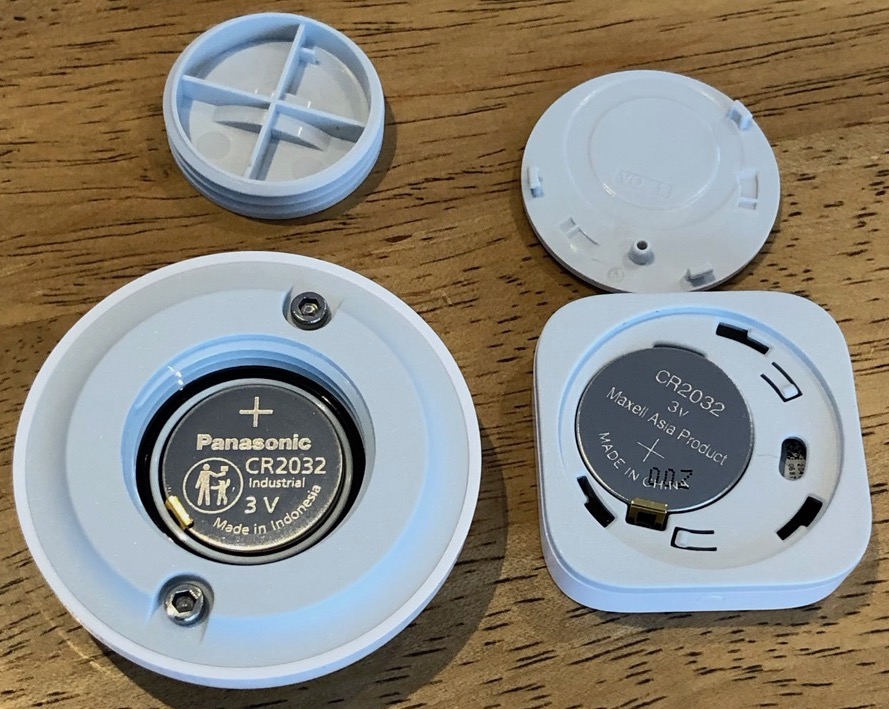
Be careful opening the temperature and humidity sensor because it only needs a very small turn to unlock it (I am guessing about 5 degrees) where as the water leak sensor takes a number of turns.
Connecting the first sensor
I will be connecting the Xiaomi Aqara Temperature and Humidity Sensor sensor first. This sensor also measures barometric air pressure.
While still on the Web UI for deconZ, navigate to the Hamburger menu and select Sensors.
Add new sensor and select Other for the vendor.
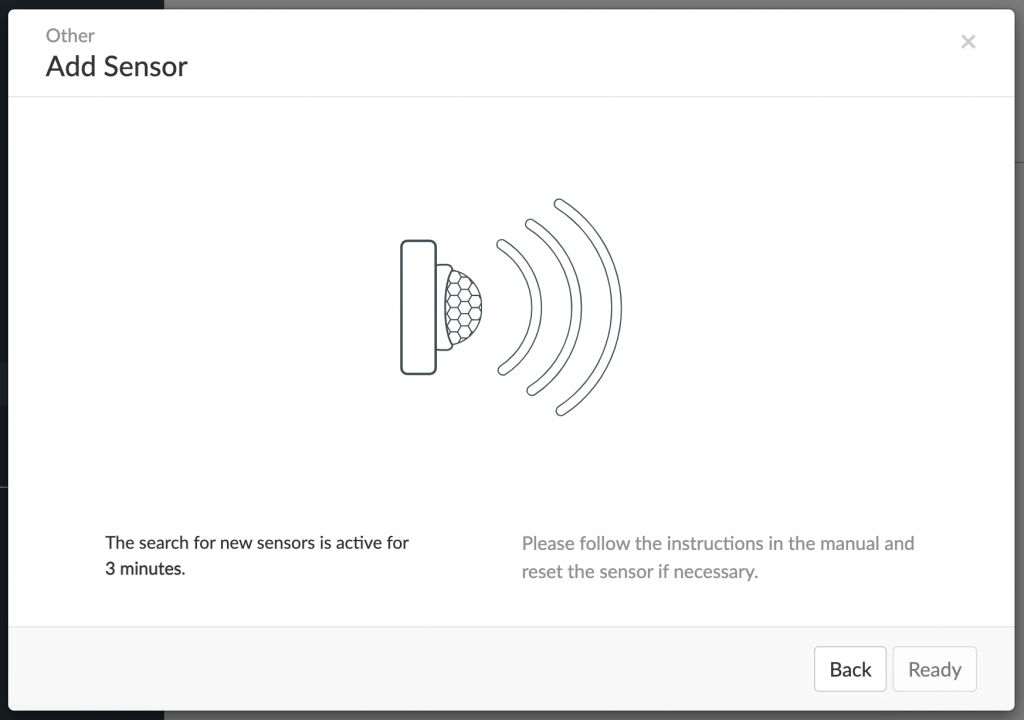
Briefly press the button on the top of the sensor and after a few seconds you will see the message that the Sensor is ready. Note. If you need to reset the sensor (in my case it was previously setup) then you just hold down the button until the led starts flashing blue.

You can select the sensor from the list and it will give you more information.

You can also rename the sensor. In my case since I have 15 temperature sensors this would be a good idea!
Connecting the leak detector sensor
Next I added the Xiaomi Aqara Water Leak Sensor.
This sensor also measures it’s own battery level and temperature, however I have found that the temperature measurment is not as accurate as the dedicated temperature and humidity sensor.
Also worth knowing is that you can attach wires to the probes on the back and thus the sensor itself does not have to come in contact with liquids.
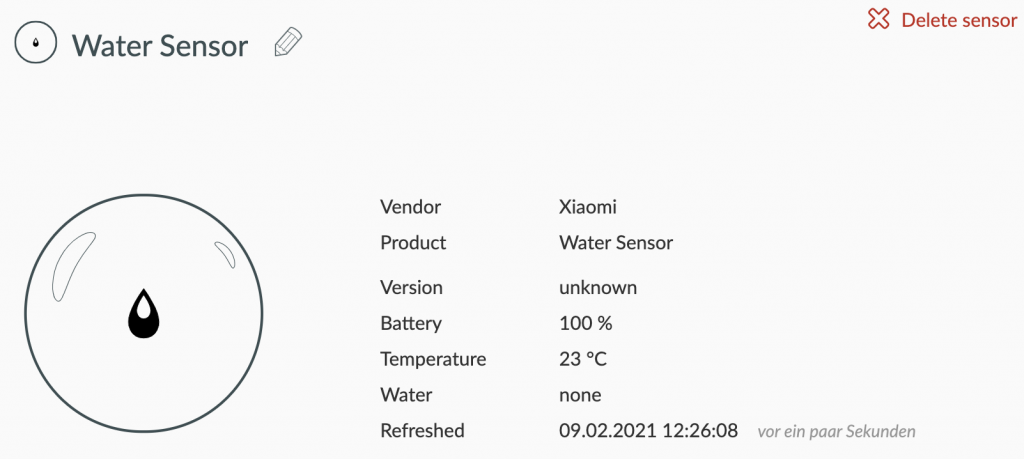
To test that it works, I just licked my index and middle fingers and placed it on the two hex screws on the bottom of the sensor. After a few seconds the interface shows that a leak was detected. I have also tested this previously by placing it on a plate with a few drops of water.

Finishing the Phoscon integration
In order for the rest of Home Assistant and other add-ons to integrate with the Zigbee sensors you will need to integrate the deCONZ gateway.
Navigate to Configuration and select the Integrations tab. There you should find the option to configure the Phoscon gateway.
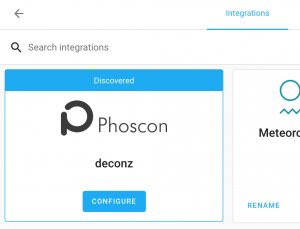
Go ahead and configure it and once it is succesfull you will see something like the following.
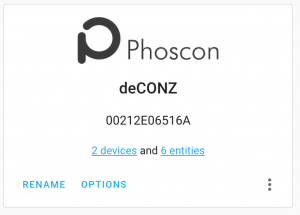
You will now be able to see the Zigbee devices in the Devices and Entities tabs.

Testing and Connecting all the sensors
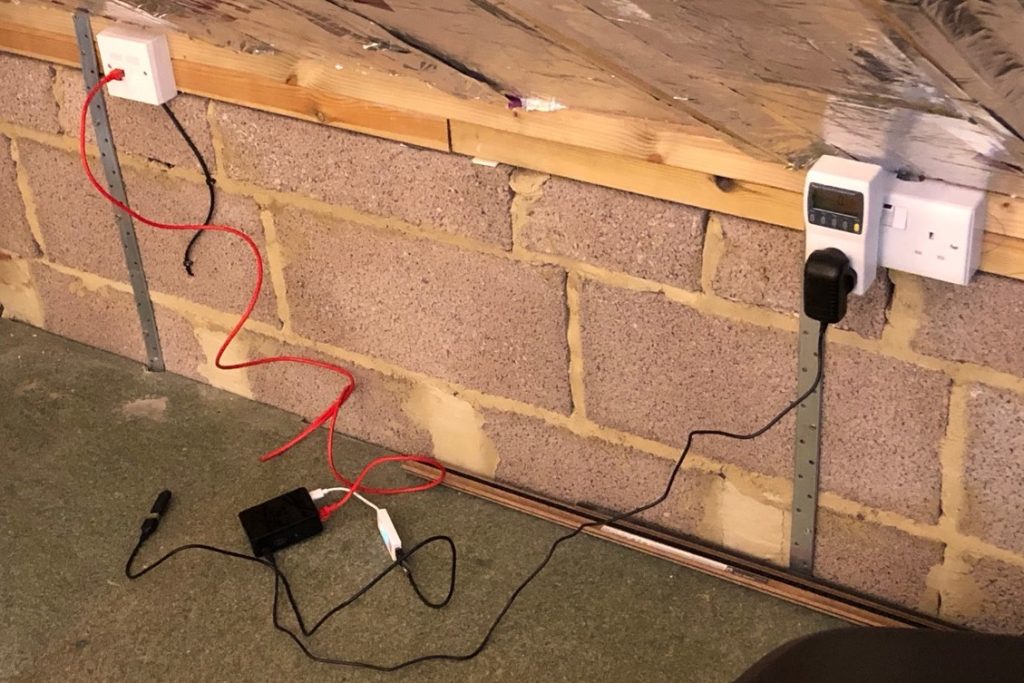
After the initial setup and testing of the first two sensors, I moved the Raspberry Pi to my “boiler room” which is also where I plan on placing my Ubuntu server once I unpack it (a story for another time).
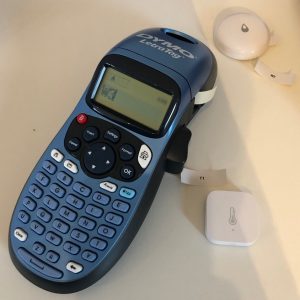
I got my Dymo LetraTag labeller out and started printing labels so it is easy to identify which sensor is which in the future especially when it comes time to replace the coin cell batteries.
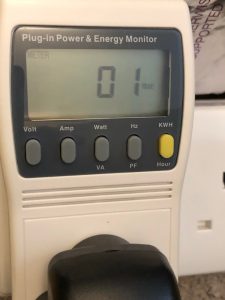
Power consumption
I used my “Watt meter” to measure the amount of current and power the gateway is using and it turns out that once the Raspberry Pi has finished booting the average usage is only 1 watt.
My mains measures about 230 volts and is 50 hertz AC.
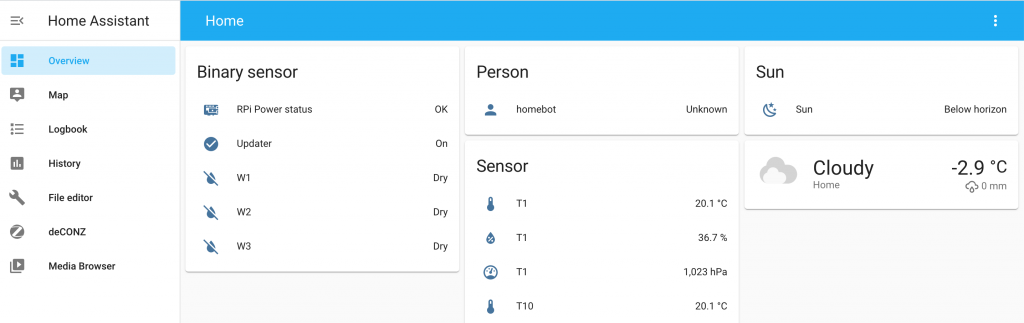
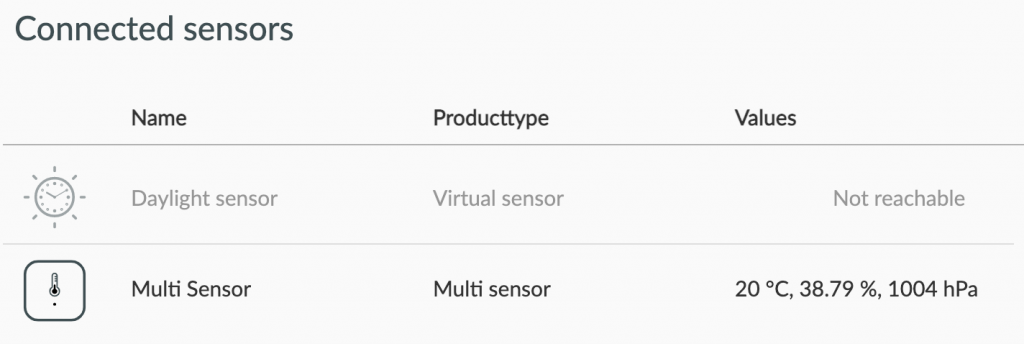
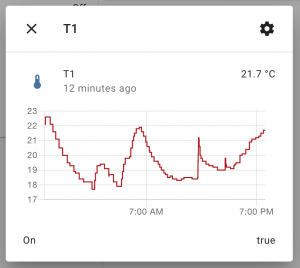
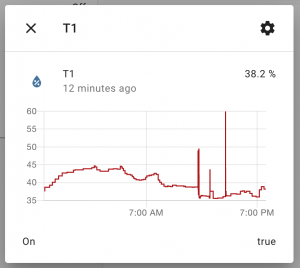
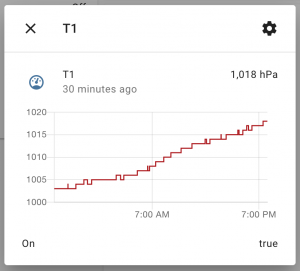
Example readings
Here is an example of what the different readings look like on the Home Assistant dashboard.
Unboxing and setting up the sensors
Here is a video of me unboxing the Temperature and Humidity sensor as well as the Water Leak sensor and then adding it to my Home Assistant setup.
References
- Trutz Fries’ tutorial
- Home Assistant https://www.home-assistant.io/
Thanks for doing these, they come in really handy.
Thank you!