Photo by Denny Müller on Unsplash
Overview
The plan for today:
- Add existing RAID array and non raided disks back to the system.
- Setup Samba file sharing.
- Setup Time machine for Mac backups.
Plan Detour
At least that was the plan when I started documenting my process. However not long after running the setup I received this email:
This is an automatically generated mail message from mdadm
running on _____

A Fail event had been detected on md device /dev/md2.

It could be related to component device /dev/sdf1.

Faithfully yours, etc.
Now do you understand why it is MEGA important to setup email notifications!?
One of the Western Digital 2TB "green" BS drives developed a couple of faults (as verified previously using SMART) and I thought it would be ok for a bit longer … but I was totally wrong and the disk start failing big time.
I decided to replace the 2x 2TB crappy drives with 2x 4TB Seagate IronWolf Pro drives.
But why stop there? I ended up also upgrading the memory to 64GB using Corsair Vengeance LPX DDR4 DRAM 2400MHz C16.
I also installed a Crucial 500GB NVMe M.2 drive and cloned over the OS install from my previous SSD (using a combination of Clonezilla and Gparted as bootable USB drives).
The remainder of this post can still be followed to see the process I followed to get to a workable Time Machine backup solution.
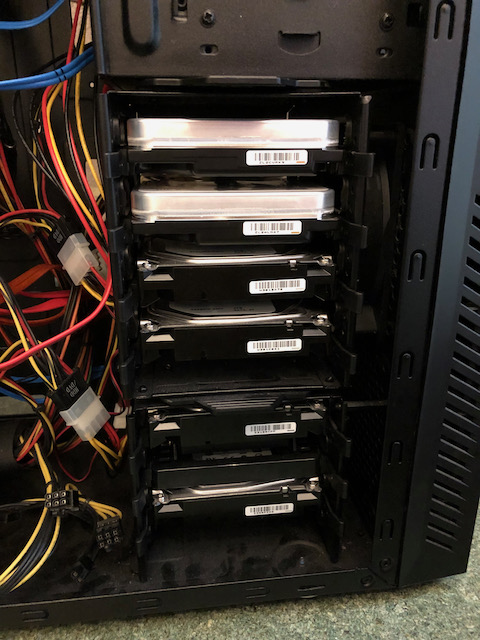
Adding back the existing hard drives
I disconnected the power and SATA cables from the hard drives to ensure that while I am formatting the SSD that nothing can go wrong in the process.
Now it is time to reconnect them and ensure the drives can be unlocked and mounted correctly.
Things to do:
- Add the 2x 14TB Seagate drives that are part of a RAID 1 array.
- Auto decrypt after the SSD is unlocked and mount as
/media/megalodon. - If you would like to know how I setup these two new disks then see my post for more details.
- Auto decrypt after the SSD is unlocked and mount as
- Add the 2x 3TB Seagate drives that are part of a RAID 1 array.
- Auto decrypt after the SSD is unlocked and mount as
/media/hammerhead.
- Auto decrypt after the SSD is unlocked and mount as
- Add the 2x 2TB Western Digital drives that are part of a RAID 1 array.
- Auto decrypt after the SDD is unlocked and mount as
/media/timemachine.
- Auto decrypt after the SDD is unlocked and mount as
- Add the 1x 4TB Seagate drive and format this to be a normal encrypted disk.
- Ext4 and mount as
/media/lemon.
- Ext4 and mount as
- P.S. If you wonder about the names, they are named after sharks 😄.
- Power down the server with
sudo shutdown -h nowand reconnect the drives. - Boot the server and unlock the OS disk (which is full disk encrypted).
- Lets see what we are dealing with.
$ lsblk

# 240 GB SSD that contains the OS
sdb                           8:16   0 223.6G  0 disk
├─sdb1                        8:17   0     1M  0 part
├─sdb2                        8:18   0     1G  0 part  /boot
└─sdb3                        8:19   0 222.6G  0 part
  └─dm_crypt-0              253:0    0 222.6G  0 crypt
    └─ubuntu--vg-ubuntu--lv 253:1    0 222.6G  0 lvm   /

# 14TB Megalodon
sdc                           8:32   0  12.8T  0 disk
└─sdc1                        8:33   0  12.8T  0 part
  └─md127                     9:127  0  12.8T  0 raid1
sdd                           8:48   0  12.8T  0 disk
└─sdd1                        8:49   0  12.8T  0 part
  └─md127                     9:127  0  12.8T  0 raid1

# 4TB Lemon
sde                           8:64   0   3.7T  0 disk
└─sde1                        8:65   0   3.7T  0 part

# 2TB Timemachine
sdf                           8:80   1   1.8T  0 disk
└─sdf1                        8:81   1   1.8T  0 part
  └─md126                     9:126  0   1.8T  0 raid1
sdg                           8:96   1   1.8T  0 disk
└─sdg1                        8:97   1   1.8T  0 part
  └─md126                     9:126  0   1.8T  0 raid1

# 3TB Hammerhead
sdh                           8:112  1   2.7T  0 disk
└─sdh1                        8:113  1   2.7T  0 part
  └─md125                     9:125  0   2.7T  0 raid1
sdi                           8:128  1   2.7T  0 disk
└─sdi1                        8:129  1   2.7T  0 part
  └─md125                     9:125  0   2.7T  0 raid1

# Check the RAID status
$ cat /proc/mdstat
Personalities : [raid1] [linear] [multipath] [raid0] [raid6] [raid5] [raid4] [raid10]
md125 : active (auto-read-only) raid1 sdi1[0] sdh1[1]
      2930037760 blocks super 1.2 [2/2] [UU]
      bitmap: 0/22 pages [0KB], 65536KB chunk

md126 : active (auto-read-only) raid1 sdg1[1] sdf1[0]
      1953285120 blocks super 1.2 [2/2] [UU]
      bitmap: 0/15 pages [0KB], 65536KB chunk

md127 : active (auto-read-only) raid1 sdd1[1] sdc1[0]
      13672054784 blocks super 1.2 [2/2] [UU]
      bitmap: 0/102 pages [0KB], 65536KB chunk

unused devices: <none>
- Small disclaimer, I previously formatted and setup the 4TB drive. I will leave details below of the process I followed.
Setting up the RAID arrays
From the lsblk output I can see that currently the drives are mapped as /dev/md127 etc. and I would like this to be /dev/md0 (md1 and md2). So first thing to do is to remap all the arrays to the device names I like to use.
- To check the details for a single array. For instance if you want the UUID.
# In this example I will show you how you can double check UUIDs
$ sudo mdadm --detail /dev/md127
...
    Name : server:5  (local to host server)
    UUID : 4b2397d7:5cb88116:eee8b5a1:1c72b091

# This can be verified with
# Note that mdadm uses : for the UUID seperator and lsblk uses -
$ lsblk -f
...
sdc
└─sdc1    linux_raid_me server:5 4b2397d7-5cb8-8116-eee8-b5a11c72b091
  └─md127 crypto_LUKS            e75d3baa-fc9d-4993-a0f0-e9b81b490354
sdd
└─sdd1    linux_raid_me server:5 4b2397d7-5cb8-8116-eee8-b5a11c72b091
  └─md127 crypto_LUKS            e75d3baa-fc9d-4993-a0f0-e9b81b490354
- In order to keep mapping info persistent, you will need to edit
/etc/mdadm/mdadm.conf. Since I don’t have any configuration specified in that file already, I can just concat info into the file and then edit.
# Become root
$ sudo -s -H
# Scan the arrays and append the info to the config file
root$ mdadm --detail --scan >> /etc/mdadm/mdadm.conf
root$ vi /etc/mdadm/mdadm.conf

# Setup where email is sent to for errors
MAILADDR user@somewhere.com

# Only change the /dev/md/server:X bits to /dev/mdN

# Megalodon 14TB
ARRAY /dev/md0 metadata=1.2 name=simba:5 UUID=4b2397d7:5cb88116:eee8b5a1:1c72b091
# Hammerhead 3TB
ARRAY /dev/md1 metadata=1.2 name=simba:1 UUID=11a0d9f1:49b7ccf4:313c4161:871a3c6b
# Timemachine 2TB
ARRAY /dev/md2 metadata=1.2 name=simba:3 UUID=e659b734:4dc6956e:7b6e6df7:3d3da262
- Save and update initramfs or the changes will not be used at boot. Then reboot to ensure this works as expected.
root$ update-initramfs -u -k all
root$ etckeeper commit "Remapped mdadm arrays"

# Reboot and verify
root$ reboot now

# After reboot and unlocking the OS disk
$ lsblk

sdc                           8:32   0  12.8T  0 disk
└─sdc1                        8:33   0  12.8T  0 part
  └─md0                       9:0    0  12.8T  0 raid1
sdd                           8:48   0  12.8T  0 disk
└─sdd1                        8:49   0  12.8T  0 part
  └─md0                       9:0    0  12.8T  0 raid1

$ cat /proc/mdstat

Personalities : [raid1] [linear] [multipath] [raid0] [raid6] [raid5] [raid4] [raid10]
md1 : active raid1 sdi1[0] sdh1[1]
      2930037760 blocks super 1.2 [2/2] [UU]
      bitmap: 0/22 pages [0KB], 65536KB chunk

md2 : active raid1 sdf1[0] sdg1[1]
      1953285120 blocks super 1.2 [2/2] [UU]
      bitmap: 0/15 pages [0KB], 65536KB chunk

md0 : active raid1 sdc1[0] sdd1[1]
      13672054784 blocks super 1.2 [2/2] [UU]
      bitmap: 0/102 pages [0KB], 65536KB chunk
Decrypting the drives
First I will check that the drives can be manually unlocked and the file system mounted before continuing to add the keyfile’s required to do this process automatically at boot time after the OS disk has been unlocked.
- For each of the encrypted drives.
# Decrypt drive
$ sudo cryptsetup luksOpen /dev/md0 temp
Enter passphrase for /dev/md0: # Paste from my password manager

$ ls -la /dev/mapper
...
lrwxrwxrwx  1 root root       7 Nov  3 12:55 temp -> ../dm-2

# Verify
$ sudo cryptsetup -v status temp

/dev/mapper/temp is active.
  type:    LUKS1
  cipher:  aes-xts-plain64
  keysize: 512 bits
  key location: dm-crypt
  device:  /dev/md0
  sector size:  512
  offset:  4096 sectors
  size:    27344105472 sectors
  mode:    read/write
Command successful.

# Only do this once, create a place to mount at
$ sudo mkdir /media/temp

# Mount the file system
$ sudo mount /dev/mapper/temp /media/temp
$ df -H | grep temp
# Go and check /media/temp that the expected files exist

# Unmount and lock again
$ sudo umount /media/temp && sudo cryptsetup luksClose temp
- Create the mount points that will be used
$ sudo mkdir /media/megalodon
$ sudo mkdir /media/hammerhead
$ sudo mkdir /media/timemachine
$ sudo mkdir /media/lemon
- Restore the previously created key files used to unlock the drives at boot. NOTE: See my previous guide on how I create the LUKS keyfile and backup the headers.
$ sudo mkdir /root/secrets
$ sudo chmod 0600 /root/secrets

# Copy the backed up header-<name> and keyfile-<name> files into /root/secrets
# I stored my keyfile and headers in my password manager

# Ensure only root can read these secrets
$ sudo -s -H
root$ chmod 0400 /root/secrets/*
root$ exit
- For each of the drives ensure that the keyfile can be used to unlock the drive.
$ sudo cryptsetup --key-file /root/secrets/keyfile-megalodon luksOpen /dev/md0 megalodon
$ sudo cryptsetup luksClose megalodon
- Edit
/etc/crypttabso that the drives can be unlocked at boot using the keyfile.
# Get the UUID that is required
$ lsblk -f
...
sdc
└─sdc1  linux_raid_mem simba:5 4b2397d7-5cb8-8116-eee8-b5a11c72b091
  └─md0 crypto_LUKS            e75d3baa-fc9d-4993-a0f0-e9b81b490354

# You want the UUID for the ones that say crypto_LUKS

$ sudo vi /etc/crypttab

# /dev/md0 Megalodon 14TB
megalodon UUID=e75d3baa-fc9d-4993-a0f0-e9b81b490354 /root/secrets/keyfile-megalodon luks,discard
# /dev/md1 Hammerhead 3TB
hammerhead UUID=084d2da7-c40f-408d-b16c-67a33217a75f /root/secrets/keyfile-hammerhead luks,discard
# /dev/md2 Timemachine 2TB
timemachine UUID=fb4d1341-d253-40ce-a592-8b20c2a5efa6 /root/secrets/keyfile-timemachine luks,discard
# /dev/sde1 Lemon 4TB
lemon UUID=1bac3dab-2262-45de-b9e1-ff361b17241f /root/secrets/keyfile-lemon luks,discard
- Edit
/etc/fstabso that the file systems can be mounted at boot.
$ sudo vi /etc/fstab

# Megalodon 14TB
/dev/mapper/megalodon    /media/megalodon    ext4    defaults    0    2
# Hammerhead 3TB
/dev/mapper/hammerhead    /media/hammerhead    ext4    defaults    0    2
# Timemachine 2TB
/dev/mapper/timemachine    /media/timemachine    ext4    defaults    0    2
# Lemon 4TB
/dev/mapper/lemon    /media/lemon    ext4    defaults    0    2
- Verify that crypttab and fstab works as expected.
$ sudo cryptdisks_start megalodon
* Starting crypto disk...
* megalodon (starting)...
* megalodon (started)... [ OK ]

$ sudo cryptdisks_start hammerhead
$ sudo cryptdisks_start timemachine
$ sudo cryptdisks_start lemon

# Mount all file systems
$ sudo mount -a

# Go check all the drives have been mounted and the file are as expected
- IMPORTANT: Ensure that initramfs is updated.
$ sudo update-initramfs -u -k all
$ sudo etckeeper commit "Drives have been added and can be unlocked and mounted"
- Final test is to reboot and check it works as expected.
Save energy by spinning down idle disks
I want the disks to spin down and use as little energy as possible after being idle for 30 minutes.
- Identify the disks by id.
$ ls /dev/disk/by-id/ata*
- Configure
hdparm.conf.
$ sudo vi /etc/hdparm.conf

# For each of the disks
/dev/disk/by-id/ata-ST14000NE0008-2RX103_ZL2ALN47 {
    # 30 minutes
    spindown_time = 241
    # advanced power management with spin down
    apm = 127
}
- Now is a good idea to tune various things using
sudo powertopagain. I noticed that by only doing the hdparm.conf changes that the drives were still using more power than they used to in the previous OS setup. However after running powertop and tuning everything to say "good" reduced the usage by about 10 – 15 watts again. - Reboot would be a good idea.
Samba file sharing
I will be using Samba for sharing files to my Macs and PCs on the local network.
- Create the required users on the linux system.
# Normal user that will have a /home and be able to login via shell
$ sudo adduser maverick

# User that will not be able to use a shell
$ sudo adduser goose --shell /usr/sbin/nologin
- Install Samba.
$ sudo apt install samba
- Add the users that will be using Samba. NOTE: This has to be the same name that exists on the system (i.e.
/etc/passwd)
$ sudo smbpasswd -a USERNAME
- Create a directory used for testing that sharing works.
$ sudo mkdir /media/greatwhite/share-test
$ sudo chown nobody:nogroup /media/greatwhite/share-test
- Configure Samba to play well with others (i.e. Mac). See this guide for more information.
$ sudo vi /etc/samba/smb.conf

[global]
   netbios name = ServerNameHere
   security = user
   # Don't disclose shares to users with no access
   access based share enum = yes

   # To work better with macOS
   min protocol = SMB2
   ea support = yes
   vfs objects = catia fruit streams_xattr
   fruit:metadata = stream
   fruit:model = MacSamba
   fruit:veto_appledouble = no
   fruit:posix_rename = yes
   fruit:zero_file_id = yes
   fruit:wipe_intentionally_left_blank_rfork = yes
   fruit:delete_empty_adfiles = yes

# This share is used for testing
[share-test]
   writeable = yes
   valid users = userA,userB,userC
   path = /media/greatwhite/share-test
   write list = userA,userB
- To check the config file is valid:
testparm /etc/samba/smb.conf. - Restart the services.
$ sudo service smbd restart
$ sudo service nmbd restart
- Allow access from the firewall.
$ sudo ufw allow samba
$ sudo ufw status
...
Samba                      ALLOW       Anywhere
Samba (v6)                 ALLOW       Anywhere (v6)
- Verify you can access the share. On Mac I could see the server under "Network" in Finder and the share-test showed.
You can also use Cmd + k in Finder and then specify the share like:
smb://server/share-test. NOTE: The linux directory’s permissions is set to nobody:nogroup and thus the users from share-test won’t be able to actually write to this directory. You will need to create a group or set permission accordingly. - Reference for future self:
[share]
# Hide files and directories to users who do not have read permissions
hide unreadable = yes
Mac Time Machine backups
Apple Time Machine is great for making incremental backups of Macs.
I will be using Samba to provide a share that Time Machine can back up to.
- [Optional] Install
avahi-daemonto enable mDNS so that Macs on the network can discover the server and services better. For example you can access the server via server.local. Once avahi is running, the server just shows up in Finder under Locations.
$ sudo apt install avahi-daemon
- Create a directory to be used for time machine backups.
# For each user that needs to be able to backup to time machine
# This user name should be the same as you use for Samba and the file system
$ sudo mkdir -p /media/hammerhead/timemachine/USERNAME
$ sudo chown USERNAME:GROUP /media/hammerhead/timemachine/USERNAME
- Configure the Samba share.
$ sudo vi /etc/samba/smb.conf

# Apple Time Machine backups
[TimeMachine]
   comment = Time Machine
   path = /media/hammerhead/timemachine/%U
   valid users = %U
   browseable = yes
   writeable = yes
   create mask = 0600
   directory mask = 0700
   spotlight = yes
   vfs objects = catia fruit streams_xattr
   fruit:aapl = yes
   fruit:time machine = yes
- Restart Samba and verify. In Time Machine preferences you can "Add or Remove Backup Disk" and the new share shows up under the "Available Disks" section. Encrypt backups ✅
$ sudo service smbd restart