Photo by Jainath Ponnala on Unsplash
Here is my Log book
I am running Home Assistant on a Raspberry Pi 3B that I am using as part of learning about home automation. At the moment the Raspberry Pi is running off a 64GB SD card and I want to swap it over to booting from an external SSD.
Home Assistant is known to either fill up the SD card or the SD card gets corrupted. I believe this is a general Raspberry Pi running 24/7 issue.
- See this post about how I have setup Home Assistant and Zigbee sensors.
- I wanted to enable SSH on Home Assistant as part of today’s learning goal.
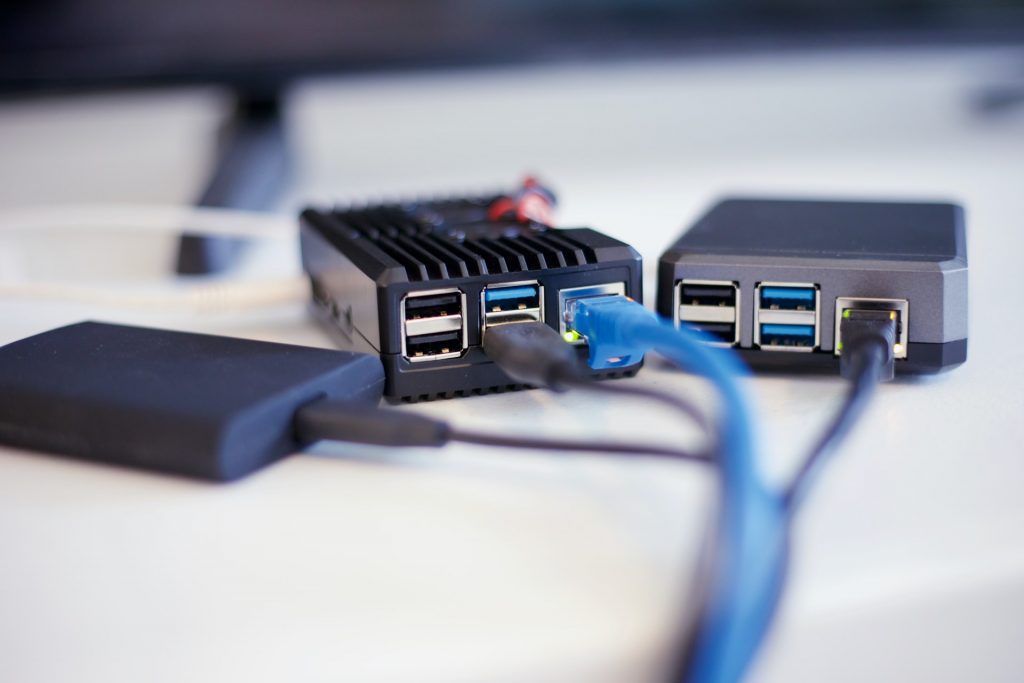
Hardware used
@ThePiHut confirmed that the SSD to USB 3.0 cable will work fine on a Raspberry Pi 3 using only USB 2.0.
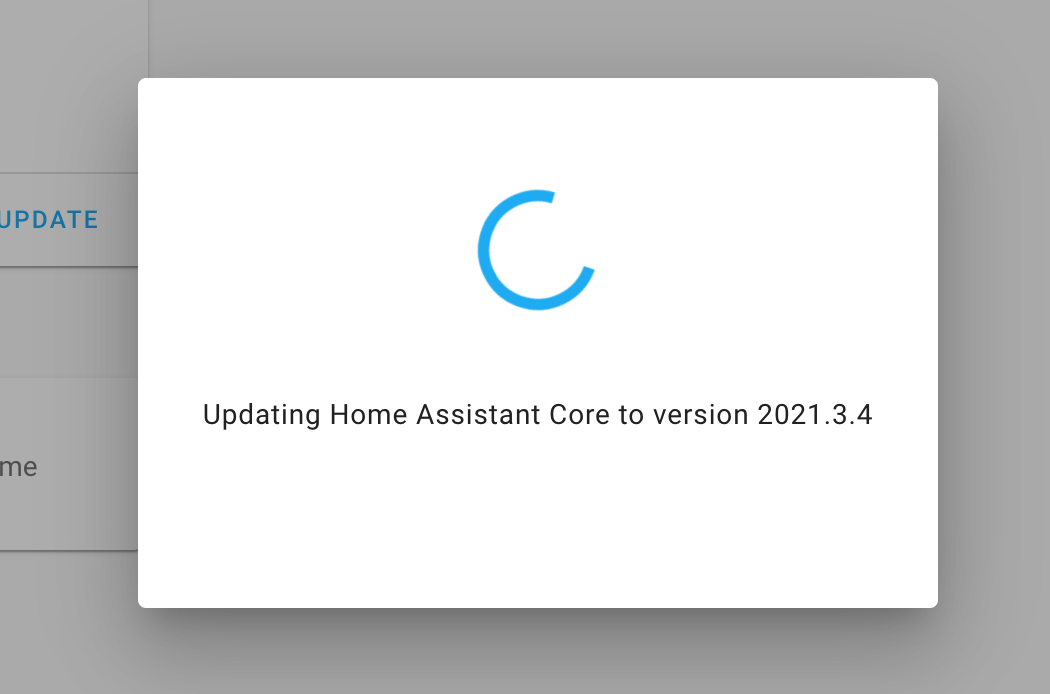
Updating Home Assistant
Logged into the dashboard and applied Updates to the OS and Home Assistant Core.
After reading a couple of forum posts it seems the best way for me to migrate from the SD card over to the new SSD would be to backup and restore. Meaning I will deploy a fresh copy of Home Assistant onto the SSD using balenaEtcher boot it up and then try to restore from a snapshot.
Backing up Home Assistant
Go to Supervisor → Snapshots.
Create a Full snapshot. I also gave it a descriptive name.
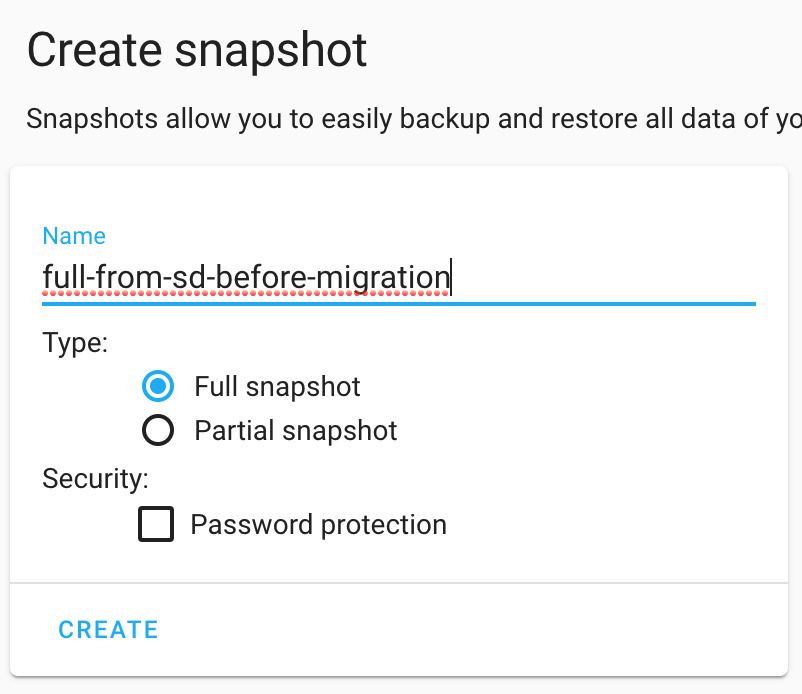
Once the snapshot is complete, ensure you download it locally and also back this up somewhere safe.
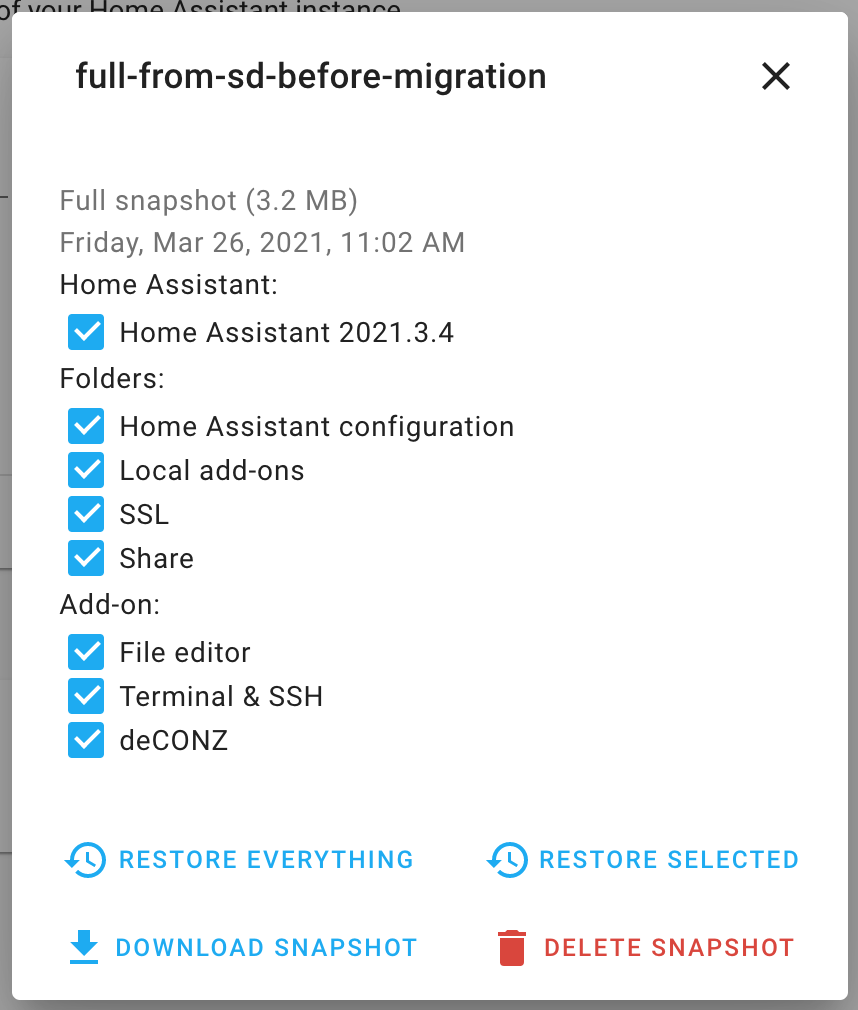
It appears that the snapshots are stored at /backup on Home Assistant OS.
Next I need to shut down the Rasperry Pi so that I can connect the SSD etc. Go to Supervisor → System → Host → Shutdown Host.
Setting up an external SSD
I want to boot the Raspberry Pi 3B completely from the SSD that is connected to USB and not require the SD card.
Just as before when I originally setup Home Assistant.
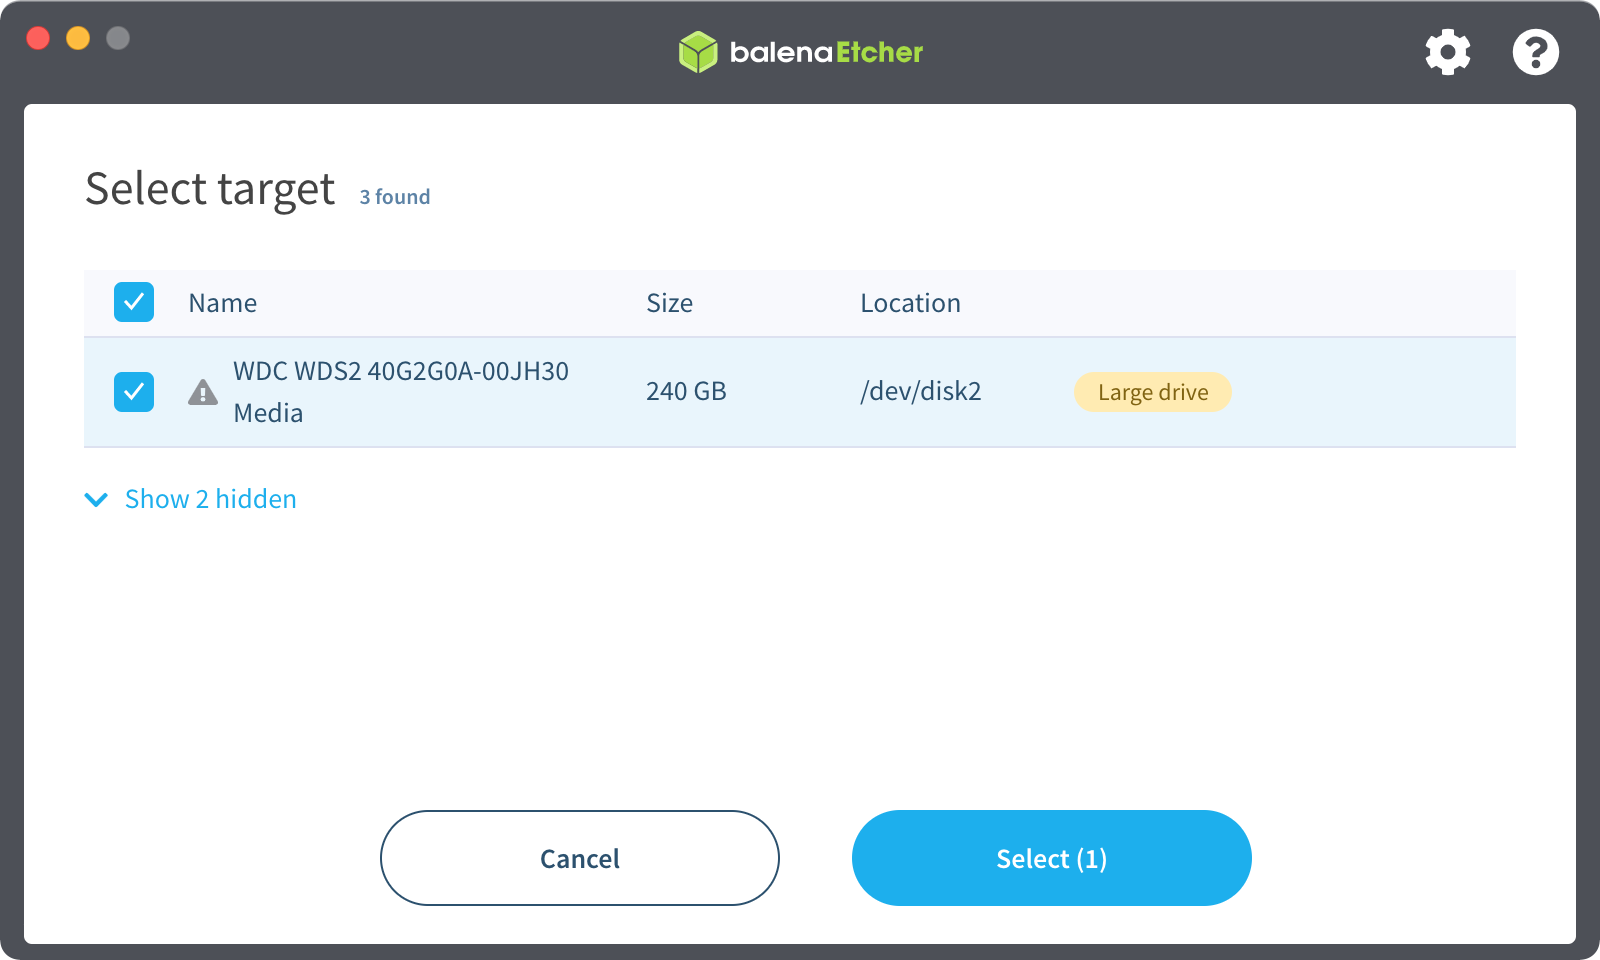
I followed the official guide for installing Home Assistant and downloaded the “Raspberry Pi 3 Model B and B+ 64-bit” image. The official guide has changed a bit and now lets you "Flash from URL". Instead I prefer to download the image locally first and then flash.
I used balenaEtcher to install the image “hassos_rpi3-64-5.12.img.xz” to the 240GB SSD.
Next I need to enable USB host boot mode on the Raspberry Pi 3B. Unfortunately I don’t have a SD card currently with Raspberry Pi OS installed so I downloaded the latest Raspberry Pi OS Lite and flashed it to a SD card (again using balenaEtcher. Also note I used a different SD and not the working Home Assistant one).
Ejected the SD and reinserted it into my Mac.
Edited the config.txt file on the SD card. I ran into some permission problem, just ejected and reinserted and it wrote to the file no issues. SD cards and computers are weird.
program_usb_boot_mode=1
Added a file called ssh and ssh.txt to the SD card to enable SSH since I will be running this Pi headless. (You only need a file named ssh but I wanted to get this right first time)
Inserted the SD card into the Raspberry Pi and booted it. I waited a minute or so and then used nmap to find the IP address. Note: Normally "raspberrypi.local" can just be found on the network.
$ nmap -sn 192.168.1.0/24
SSH into it to verify that the USB host boot mode has been enabled.
$ ssh pi@raspberrypi.local
Password is just: raspberry

pi@raspberrypi:~ $ vcgencmd otp_dump | grep 17:
17:3020000a
3020000a is the correct value.
Next I shutdown the Raspberry Pi (sudo shutdown -h now) and removed the program_usb_boot_mode line from config.txt file just incase I use this SD card in another Pi I did not want to write this one time programming bit to.
Moment of Truth
I attached the SSD via USB to the Raspberry Pi 3B and turned it on. Waited a few minutes.
$ ping homeassistant.local
PING homeassistant.local (192.168.1.69): 56 data bytes
64 bytes from 192.168.1.69: icmp_seq=0 ttl=64 time=5.899 ms
Opened http://homeassistant.local:8123/ in the browser.
Voila! Booted the Raspberry Pi from an SSD attached via USB. Amazing!
Restore from snapshot
I made the mistake of not seeing the link to restore from a snapshot on the very first onboarding screen. So I proceeded to add a username and password. Turns out that there is no easy way to restart the onboarding process and you have to delete the configs directory or just continue until the onboarding is finished.
Upload the snapshot by going to Supervisor → Snapshots → 3 dot menu (top right) → Upload snapshot.

Confirm that you are happy to wipe the system and then the Raspberry Pi will be rebooted.
After a few minutes I was able to login and the system is running just as it was when it was still on the SD card.

Since the system is back up and running, now is a good time to take another full snapshot and back it up locally.
Next actions?
- I want to upgrade the database being used to MariaDB.
- I also want to backup the historical sensor data to AWS S3 and have local backups.
- Write an alarm system to warn me when the Water Leak Sensors detects a leak.
Netbooting multiple Raspberry Pis
Alex Ellis released a new workshop on how to setup netbooting. Once I get a bit of time to setup my Raspberry Pi 4 cluster then I would love to learn more about this.
Thank you very much for your detailed guide, it worked great for me!